To add End Customers, you need to click <Add> and then perform the following
steps:

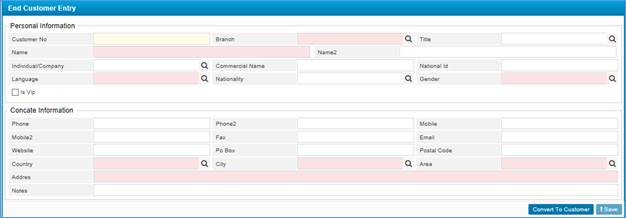
Figure 30 (End Customer Entry)
- The Customer Number
is auto-generated by the system once you save the end customer;
- Select the Branch;
- Select the Customer Title
from the predefined list;
- Enter the customer Name;
- In Name2, you
can enter the name in the second language of the system;
- Define whether the end
customer is an Individual or a Company;
- If Company, enter the Commercial
Registration Number;
- If Individual, enter
the National ID;
- Select the customer Language;
- Select the customer’s Nationality;
- Select the customer’s Gender;
- If you want to mark
this customer as VIP, check the Is VIP checkbox, otherwise, leave it
unchecked;
Next, you need to enter the customer’s Contact Information:
- Enter the Phone,
Phone2, Mobile, Mobile2 and Fax numbers;
- Enter the Email
and Website;
- Enter the PO Box
and Postal Code;
- Select the Country,
City and Area;
- Enter the Address;
- Enter any necessary Notes;
- Once you have done
defining the necessary data, click<Save>.
If you want to convert this sales end customer to a
financial customer, click![]() ;
;
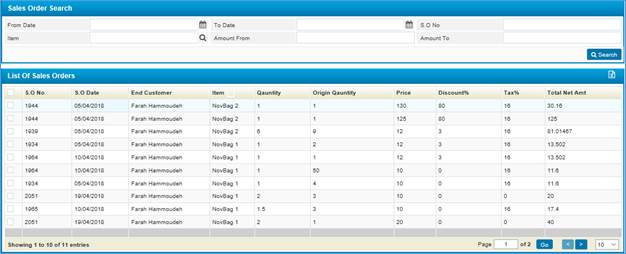
If the sales Customer is mapped with a Sales Order in the
Sales Order details, the details of the sales and items will be displayed once
you click on the customer as below:

Figure 31 (List of Sales Orders)