

| Financial 2013 Add Purchased Assets List |
   |
To add the purchased assets list, first
select the main purchase entry from the Assets Purchase Entry block.
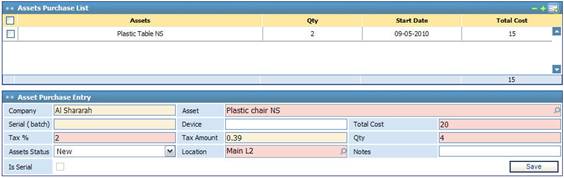
Next, in the Assets Purchase List block click ![]() . Accordingly, a second Asset Purchase Entry block appears at
the bottom of the page through which you need to perform the following steps:
. Accordingly, a second Asset Purchase Entry block appears at
the bottom of the page through which you need to perform the following steps:
§ The Company name is automatically retrieved by the system;
§ Select the purchased Asset. You can select assets from a list of assets that were previously defined through the Definitions page;
§ The Serial (Batch) number is automatically given by the system upon saving this purchased asset entry;
§ Enter the Device number of the asset, if any;
§ Enter the Total Cost of the purchased asset;
§ Type in the Tax Percentage applied to this purchase. Accordingly, the system automatically calculates the Tax Amount;
§ Enter the Quantity of the purchased asset(s). However, if a device number was entered then the quantity will be automatically set by the system to 1;
§ Specify the Asset Status (New or Used);
§ Select the Location of the purchased asset(s). Locations can be defined through the Locations page. Locations are filtered according to the selected Branch;
§ Enter any necessary Notes concerning the purchased asset(s);
§ Click ![]() to save your work.
to save your work.
Related Topics
| |